
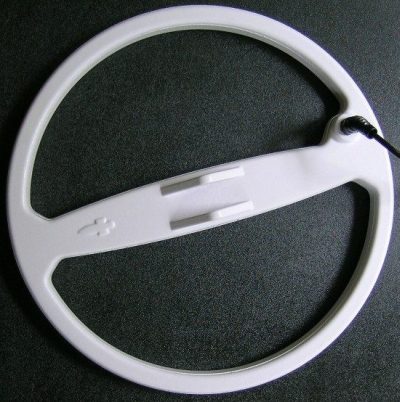
Building an Explorer Coil - Why build my own?I became frustrated with the limited selection of coils available for my detectors (Explorer, Sovereign, and Excalibur). My site conditions vary considerably and often I found myself wishing I had different coil that better fit my particular site condition. The right tool for the job makes all the difference and detecting is no different. Manufacturers have to build a coil that appeals to a wide segment of the market. That means a DD or concentric in some common size wound in a way that will work in a wide variety of soil types e.g. generic. How big is the market for 16 inch concentric coils to hunt the dry sand up near the dunes where 1700's shipwreck treasure is buried? Not very and thats probably why nobody offers a 16 inch concentric but you could build your own. I'm building a 16 inch concentric for that very reason. Manufacturers also have to build coils to last under the worst abuse therefore they tend to build indestructible coils that are quite a bit heavier than they need to be, as much as twice as heavy. For certain types of hunting (beach, farm field, etc) where I might swing the coil for an hour before finding a good target to dig I wanted a lightweight coil. If the coil is too heavy my arm is going to give out long before my desire to keep detecting. So one day I decided I'll just make my own coils, a decision that has tested my sanity on more than one occasion I might add. It took about 3 years to figure it all out but I can say with confidence today that building your own coil is not that difficult with the information I'm going to share with you. Let me say also that there is nothing quite as satisfying as building your own coil to custom fit one of your sites, then going out and finding treasure with it. Here are a few tools you will need to build a coil. Don't let the electronic tools spook you if you have never used them before, in coil building they are only used for a few simple tasks. 1. Oscilloscope - I bought my first scope on eBay for $80, a 20mhz BK Precision. I later purchased a new Instek and a Picoscope but the old BK gets the job done just as well. In fact I gave it to a friend and he's using it to build coils. You want a dual trace 2 channel scope. They are surprisingly reasonable in price new, so much so that I felt it was not worth the risk of buying used when I could get a new scope for a couple hundred dollars more. That said if our budget is tight then shop eBay for a used scope, they can be had for as little as $40. 2. LCR Meter - This meter measures inductance (L) capacitance (C) and AC resistance (R). Why the hell they used "L" for inductance instead of "I" who can say. You don't see these come up for sale used very often so both of mine were purchased new. They sell some cheap $80 LCR meters but I don't recommend them. Extek makes a good entry level LCR meter for coil building, it also measures Q which I feel is an important factor in coil building. They are about $170 last time I looked. I later purchased a BK Precision 879. They are around $300. 3. Digital Multi-meter. Any reasonable quality digital multi-meter will do. You just need to be able to measure DC resistance. I have a BK Precision meter that is a bit overkill. Note the LCR meter measures AC resistance (impedance) thats why you need a multi-meter for measuring CD resistance. 4. Good quality soldering iron. Adjustable wattage if possible. Any old iron will tin the RX (receive) winding leads but if you use 19 guage litz for the TX (transmit) winding you will need a good 40 watts or more. 5. Wire cutters and strippers. 6. A long 5/16 inch drill bit for drilling a hole in shell wings for the lower rod bolt. 12 inch or so will do. This should be a brad point wood bit, speaking from experience using a common twist drill bit may mangle the crap out of your wings if it gets away from you. Grrrr! 7. Adjustable wrench for the cable flex fitting. 8. Needle nose pliers. 9. Some plastic cups and containers for mixing epoxy. You will want to wind your coils so that they are within factory specs (at least at first) so step one is to gather up your stock coils and measure them with your LCR meter and digital multi-meter. By measuring a number of coils you will establish a range with upper and lower limits for inductance, DC resistance, capacitance, and Q (quality factor). If you only have one stock coil email me and I will send you some additional measurements. The coil is not under power when taking these measurements however there should be no metal near the coil. The coil normally has an "air" core. If you give the windings an iron core by placing the coil on a metal workbench to test it will throw your measurements off. Test Fixture: In a pinch you could cram some wire in your 5 pin coil connector to attach your meter leads to or you could build a test fixture. A test fixture is easier and safer. Later when you are balancing your coil on the scope under power a test fixture will be required so you might as well plan on building one. You will need one 5 pin male and one 5 pin female connectors for your test ficture. These are common microphone connectors, a Google search should produce a number of suppliers. You may as well order a few extra female connectors as you will need one for each coil you build. You want to solder a short lenth of wire between the two connectors and remove the insulation from an area so you can clip on your meter test leads. I'll post a picture of one to this thread when I get back to NY after the 25th. Where's your notebook? You should have a small notebook handy for recording important information like the following... I'll post a pic of the pin assignments to this thread when I get back to NY after the 25th, but for now you can begin by measuring DC resistance between pins on your stock coil connector. You want to find the two RX (receive winding) pins and the two TX (transmit winding) pins. The 5th pin is not used. RX will measure about 6 ohms resistance and TX will measure about 1 ohm resistance. Make a little drawing of the connectors 5 pins and the key slot on the bottom and label them RX and TX in your notebook. Later you will tag each pin RX Main, RX shield, TX Main, TX Shield. Record your DC resistance measurements. Now connect your LCR meter to the RX pins. You should measure LCQ in "series" mode. Some LCR meters have a "parallel" mode and may even default to this mode, you want series mode. My BK 879 has both 1kHZ and 10kHZ test frequencies, I measure LCQ at both frequencies and record the results in my notebook for later reference. Next measure TX then move on to the next coil. The size (guage) of magnet wire you use will vary depending on the size of the coil you are building. The general rule of thumb is, the larger the coil the heavier the guage wire you will need. The TX (transmit) winding typically uses 19 or 20 guage wire. For very small coils possibly 21 guage. What you are trying to balance is inductance and resistance. To meet factory specs TX needs about 590uh inductance and .92 to 1 ohm resistance (including the coil cable which adds about .12 ohms). If you wind TX to 590uh and find that you are high on resistance say 1.3 ohms you need to use a heavier guage wire. If you are low then you need a lighter guage. The RX (receive) winding is much more sensitive than TX to changes in coil size. You need about 500uh inductance and 6.1 to 6.3 resistance (including the coil cable which adds about .12 ohm). Depending on coil size you may need anything from 28 guage to 32 guage wire and all the half sizes inbetween e.g. 28.5, 29.5, etc to match factory specs. Solid magnet wire is much less expensive than Litz magnet wire but after winding many coils with both I would recommend Litz for TX. The signal is much cleaner with less overshoot. Some are experimenting by using Litz for RX as well and reporting improved results but I think solid is fine for RX. A good source for Litz wire is eBay, you will pay a fraction of what commercial sources charge for Litz. Planet Engineers is a good source for half sizes of the lighter RX guages. You will want to build a jig for winding your coils. Some use nothing more than a peice of plywood with some metal picture hanging screws attached in the rough shape of the winding and hand wrap the wire around these. A better approach would be to make a two piece winding jig out of 1/2 inch plywood or polyethelyene (the white plastic cutting boards are made from) cutting it into the shape of the actual winding. Lets say you are making a 14 inch DD coil. Cut the plywood in the shape of the winding plus 3/8 inch oversize. Then cut a 3/8 wide channel in one of these with a router for the windings and sandwich the two together with some nylon bolts. I also drill a few 5/16 inch holes around the parameter and cut these into a "U" shape, this gives me room to slip some zip ties around the winding to hold it together. Polyethelyene is good because its nearly as non-stick as teflon and so you could coat the windings with some expoxy before removing them to help them hold their shape. I went further and drilled a 1/2 inch hole in the center of my winding jigs. I then mount them on a simple winding stand which uses a 1/2 inch bolt for an axle with a hand crank on one side. The spools of wire are held at the rear of the winding stand. This makes winding a coil quite easy. A side note on winding jigs for DD coils. Your RX jig will need to be a little larger than your TX jig if you want the RX winding to be centered in the shell channels. TX will be .25 to .35 inches wide. RX will only be about .125 inches wide so if you wind RX on your TX jig, it will hug the inside of the channel rather than be centered. There is really no limit to what you can do here. You could motorize the winding stand. Add a mechanical counter (its easy to lose your count and 1 turns makes a difference). Lets talk about the cross section profile of your TX winding. You could make your TX winding flat .400 inch wide x .125 inch tall, square .25 x .25 or tall .125 wide x .400 tall or anywhere inbetween. In testing the Explorer doesn't much like flat TX windings, especially on concentric coils. For TX I recommend the square profile. The RX winding requires some extra care. You want a low Q (quality factor) winding e.g. sloppy and inefficient. You could wind RX neat and tight boosting the Q (quality factor) but thats a bad thing when making an Explorer coil. It will also boost the capacitance and you don't want to do that. And it would boost inductance by up to 2 turns worth. If you have played around with inductance calculators you know by now that coil length is a critical factor. The term coil "length" can be confusing. The calculators were designed to measure long single layer coils wrapped around a piece of pipe or cardboard tube. If you wrapped your RX winding around a cardboard tube the coil length would only be about .125 (1/8 th) inch long with the winding bunched together maybe 6 layers thick. So when calculating inductance for detector coils coil length is more accurately described as coil thickness. So, coil length (thickness) is a critical factor in inductance. The shorter the length the higher the inductance e.g. there can be a difference between a 40 turn RX that is loosely bound (.125 in length) and one that is tightly bound (.080 in lenth). Its quite easy to tape an RX winding so tight that you squeeze out up to 2 turns worth of increased inductance thus throwing your coil way out of spec. Just loosely bind them. I apply a few zip ties to hold my windings together, they would otherwise spring into a birds nest when I removed them from the jig. Once removed I then take some 3/4 inch masking tape and wrap them in a few spots and remove the zip ties which are bulky and generally get in my way. The profile of a RX winding for a DD coil should be a loosely bound square shape. BUT...for a concentric coil in testing I found that a "tall" profile is better .25 inch tall and maybe only .040 inches thick, like a cylinder. Flat wound RX windings for a concentric were ugly on the scope. Square'ish were better but not great. Tall were pretty nice. Bucking Coil - If you are building a concentric coil you will need to also wind a bucking coil onto the outside of your RX winding using TX wire. Concentric coils generally have a TX winding that is twice the diameter of the RX. So a 10 inch concentric coil will have a 10 inch TX winding and a 5 inch RX winding. You don't have to use this ratio but this keeps the math simple. So TX is twice the diameter of RX, how much bucking coil do you need? Well you need 1/4 turn of bucking coil for each turn of TX. So if you have a 40 turn TX you will need 10 turns of bucking coil to balance the coil. I caution you, this is only a rough guestimate. You may find that you need 9 turns of bucking coil, or 9.5 turns, so its good to leave the last winding of bucking coil loose (don't tape down) so you can move it around when balancing. Next up, balancing the windings. Well finally we get to use this cool oscilliscope gadget, balance a coil and wave some coins over it to hear it beep. Note I will add some scope pics to this thread when I get back to NY after the 25th. Balancing a DD Coil Disclaimer - It is entirely possible to cross wire something and damage your machine, yourself, your shop, your house, etc. if you are not careful. If you plan to build your own coil it is important that you understand that YOU assume all responsibility for any damage due to typo's or errors in the information provided, sun spots, bad luck, curses, or whatever. If you are not prepared to see smoke rising from your control box stick to detecting. At this point your Explorer is TURNED OFF! You have your coil cable ready e.g. a 5 pin female connector soldered to one end, and the other end fished up into your coil shell with the leads tined and ready. Your RX and TX winding leads are tinned and ready. You have your text fixture complete so that you can plug your coil cable into one end, and connect the other end to your Explorer which is still TURNED OFF! You are quite sure that you have your wiring correct. My shop Explorer has survived a number of cross wiring ooopses, yours may not so get it right before you move on. Lay your windings into the shell RX first, TX on top of RX. Out of the Explorer control box you have TX main and TX shield wires, RX main and RX shield wires. Solder TX leads to your TX winding in such a way that water would flow out of TX main into your TX winding and flow around the TX winding in a clockwise fashion, exiting the TX winding and flowing into the TX shield wire. RX is just the opposite, connect RX main to your RX winding so that water would flow from RX main to your RX winding and flow around the RX winding in a counter-clockwise fashion, existing the RX winding and flowing to RX shield. Connect the channel 1 scope probe to TX main on your test fixture. Set channel 1 to 5 volts division. Connect the channel 2 scope probe to RX main on your test fixture. Set channel 2 to 5 volts division. Trigger should be set to channel 1. Time should be about .1 Connect a lead from your scope ground source to both probe grounds, and also to the RX shield wire (the Explorer ground) on your test fixture. Don't get this wrong. Turn on your scope. You are now ready to switch on your Explorer, make another quick check of the wiring, if its correct and no wires are touching go ahead and switch on the Explorer. Turn the sensitivity down to 10 at least, maybe more depending on how much electrical interference you have in your house. You will probably have to adjust the trigger so you see a steady signal. The Explorer may be giving you an overload tone if the windings are out of balance, thats not a big deal. The TX signal on your scope will show about 5 volts, the RX may be nearly that much or completely flat depending on how well the windings are balanced. How much the windings overlap in the shell effects the balance, if RX on the scope is not a flat line nudge the windings so that they overlap more, or less while watching the scope. When you get it flat, then start cranking up the volts division. Go to 1 volt division, then .1 div, then 50milivolt div, all the way to 10 milivolt div if you have it, slightly adjusting the winding overlap to keep the RX signal on the scope flat lined. When properly balanced RX will appear flat compared to the square wave on TX and you will have a steady threshold tone. You can then wave some coins over the windings and it should respond correctly. I like to check the ID of a silver quarter versus a silver half. Half dollars hit slightly lower on the screen than a quarter. I also test a silver dime to a clad dime. With max variablility and ferrous tones they should sound different with the clad dime being a big lower in tone at least on some sweeps. Congrats, you have just balanced a coil!!! You probably noticed that once you get down to 10 milivolts div it takes barely a nudge where the windings overlap to knock them out of balance. Thats your next challenge, keeping them in balance while you finish assembling and potting the coil with epoxy. I'll write a seperate tip sheet on how to do that. 

|


