A breakdown of installing a swimming pool.
Your dream of a slim figure is almost a reality! Do you know that a single hour of strenuous swimming burns 650 calories more than walking or biking? It also strengthens your heart and lungs. But before talking about losing weight and health, you must have a swimming pool to do your thing. Prior to all of these is the installation of your swimming pool by a reliable provider.
Here is a breakdown of installing swimming pool at home.
• Choose a swimming pool kit and have it shipped.
The swimming pool kit of your choice is shipped from a reliable provider and will arrive at your door in a week or two.
• Select the site for your swimming pool
Set an elevation so that the top of the pool will be 6 to 12 feet above the existing ground at the highest part of your concrete apron.
• Excavating the hole
1 day - Your installer will dig the hole on your chosen site. It will take around 6-8 hours for an experienced operator to dig.
• Wall assembling
1 day - The walls are placed together on a ledge that is dug over around the pool. They will be leveled using a transit that is set on a tripod. The coping is affixed throughout the top including the self-tapping screws. The liner is the receptor slot and acts as form for pouring the concrete apron.
• Pour footing around the wall
½ day - Secure everything in place. The footing must be from 8 to 10 inches thick and 2 feet wide. There will be no more adjustments made on the wall after 6-8 yards of concrete are poured.
• Plumbing the pool
1 day – 40 PVC pipe and fittings are provided. PVC uses hacksaw to cut and is glued in seconds. Plumbing the pool can be done in a couple of hours successfully by a crew member.
• Putting the bottom in
1 day – Have a local concrete finisher do the mixing and installing the sand & Portland bottom. The weight of the water cannot be supported up the sand and Portland bottom but it is able to separate the dirt from the liner giving the liner a good uniform and smooth look.
• Hanging the liner and putting in the faceplates
½ day - This task needs 2 to 3 people and takes about 2 hours to hang. The liner snaps in the coping and fits the dimensions of the pool. A wet-dry shop vacuum is used to absorb the air as it exits from the back of the liner, which is pulled tightly in place. As the water is filling, the faceplates are placed.
• Backfilling the pool
½ day - The backhoe operator is needed to backfill or to loosen all the dirt around the pool. This should be ready for the concrete finishers.
• Finishing the concrete apron
1 day – The concrete finisher is back to complete placing concrete around the pool. The work is best done with a broom finish that is from light to medium. At a distance of ½ inch per foot, finisher slopes away from the pool.
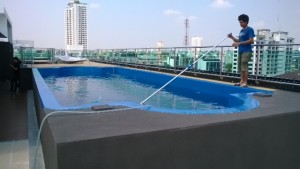
• Cleaning it up
Last day - Clean the pool using the manual vacuum and adjust the chemicals.
Always use the right equipment and chemical. Buying quality is always the smartest and least expensive way to go and it is always the advice of the pro. Your goal as pool owner is to see that your pool is installed as smoothly and efficiently as possible. Your pool is ready for the plunge!